Brown Butter Pumpkin Layer Cake

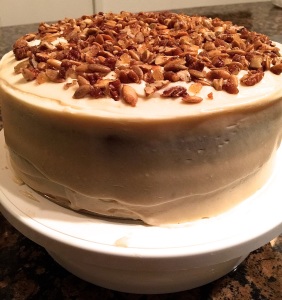
Brown Butter Pumpkin Layer CakeLate September, early October I begin to see sugar pie pumpkins at the market and immediately start making my plans to bake a brown butter pumpkin layer cake.

“A gingery glazed nut topping and brown butter spiked cream cheese frosting are the finishing touches for the spectacular spiced pumpkin cake”. I couldn’t of said it any better than that! This cake is so worth the effort and is a sure hit with family and friends! THANKS to Fine Cooking Magazine for publishing this recipe!

This recipe looks overwhelming with four different components but, preparing the pumpkin puree in advance you will save a lot of time.

For the Puree:
2 t. vegetable oil
1 medium-large Sugar Pie pumpkin, cut in half from stem to bottom and seeded

Position rack in the center of the oven and heat the oven to 350 degrees. Brush a rimmed baking sheet with the oil. Put the pumpkin halves in the sheet cut side down and bake until tender when pierced with a fork, about 45 minutes. Let cool. Scoop out the pumpkin flesh into a food processor and blend until smooth. You can make the puree up to two days ahead or freeze for later use.

For the cake:
6 oz. unsalted butter, more for the pans
9 oz. all purpose flour, more for the pans
1 ½ t. baking soda
1 ½ t. ground cinnamon
1 t. ground ginger
¾ t. salt
¼ t. ground cloves

1 ½ C. granulated sugar

2/3 C. firmly packed light brown sugar
2 large eggs
½ C. buttermilk

Position a rack in the center of the oven and heat the oven to 350 degrees.

Butter two 9 inch round cake pans and line with parchment. Melt the butter in a heavy-duty quart saucepan over medium heat. Cook, swirling the pan occasionally until the butter turns a nutty golden-brown, about 4 minutes. Pour into a small bowl and let stand until cool but not set, about 15 minutes. In a medium bowl, whisk the flour, baking soda, cinnamon, salt and cloves. In a large bowl, whisk 1 ½ C. pumpkin puree with the granulated sugar, brown sugar, eggs, and buttermilk until very well blended. With a rubber spatula, stir in the flour mixture until just combined. Gently whisk in the brown butter until completely incorporated. Divide the batter evenly between the prepared pans. Bake the cakes until a tester inserted in the center comes out clean, about 28 minutes. Let the cakes cool in the pans for 10 minutes. Turn the cakes out onto racks, remove the parchment, and cool completely.

For the topping:
1 ½ T. unsalted butter
2/3 C. pecans
½ C. unsalted, raw, hulled pepitas
2 T. firmly packed light brown sugar
¼ t. salt
1 ½ T. chopped crystallized ginger

Melt the butter in a heavy-duty non-stick skillet over medium heat. Add the pecans, pepitas and cook until the pecans brown slightly and the pepitas begin to pop, about 2 minutes. Sprinkle in the brown sugar and salt and stir until the sugar melts and the nuts are glazed, about 2 minutes. Stir in the ginger. Remove from the heat and let the mixture cool in the skillet.

For the Frosting:
4 oz. unsalted butter
8 oz. cream cheese, at room temp
¼ C. firmly packed light brown sugar
1 ¼ C. (5 oz.) confectioners’ sugar

Melt the butter in a heavy one quart saucepan over medium heat. Cook, swirling the pan occassinoally until the butter turns a nutty golden-brown, about 4 minutes. Pour into a small bowl and let stand until the solids settle at the bottom of the bowl, about 5 minutes. Carefully transfer the bowl to the refrigerator and chill until just firm, for about 18 minutes. Using a spoon, scrape the butter from the bowl, leaving the browned solids at the bottom.

Using an electric mixer, beat the butter, cream cheese, and brown sugar on medium high speed until light in color and the brown sugar has dissolved, 2 minutes. Gradually beat in the confectioners’ sugar and continue beating until fluffy, 1 to 2 minutes

Assemble the cake:
Put one cake layer on a cake plate. Spread ½ C. of the frosting on the layer. Sprinkle ½ C. of the nut mixture over the frosting and top with the second layer. Frost the top and sides of the cake with the remaining frosting. Arrange the remaining topping on the top of the cake. Can be refrigerated for up to 2 days. Best served at room temperature.
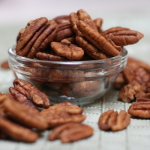
Pecan Crispies

This recipe is a family favorite and was passed down to me from my Mother. I hope your family enjoys these cookies as much as my family does.

Pecan Crispies

A buttery pecan treat.

  • 1/2 C Shortening
  • 1/2 C Butter (softened)
  • 2 1/2 C light brown sugar
  • 2 Large eggs
  • 2 1/2 C All purpose flour
  • 1/2 t Baking soda
  • 1/4 t Unsalted butter
  • 1 C Pecans (coarsely chopped)
  • 1 C Pecans halves
  • 1 t Vanilla extract
  1. In a large bowl, combine all dry ingredients and set aside. In another bowl, combine the shortening , butter, vanilla and brown sugar and mix until light and fluffy.
    Add in eggs, one at a time beating well after each addition.
    Stir in all dry ingredients into the butter mixture.
    Stir in the chopped pecans.
    Using a cookie scoop or tablespoon, drop dough onto a lightly greased cookie sheet. Gently press 1 pecan half into each mound of dough. Bake at 350 degrees for 9 -12 minutes. Cookies should be a light golden brown. Remove immediately onto a wire rack to cool.

Flour Tortillas

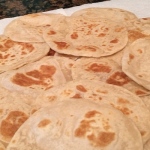
There’s nothing better than a fresh homemade tortilla hot off the comal!

I was so blessed to grow up surrounded by wonderful women who were passionate about food. Their kitchens were always well stocked and they would spend whatever spare time they had preparing wonderful meals for their families.

When I was a young girl, my family would routinely make the six hour drive from Houston, Texas to Laredo, Texas  to visit my grandparents; my Ula and Papa Grande.

My grandmother was a big influence on my love for home cooking.  She routinely prepared three hot meals a day and always set a perfect table including table linens and her light  blue Fiestware dinner plates. At the time, I was too young to understand or appreciate the effort and work involved in providing those meals.  Fifty years later, I have a very different perspective and appreciation for all the meals she, along with my own Mom, so lovingly prepared for her family. One of her kitchen staples, and that of many Hispanic families,  was tortillas de harina.

Now days, tortillas are served everywhere.  Packaged tortillas are found in any supermarket or corner store. While you can find a decent packaged tortilla, I find most packaged tortillas are spongy, chewy, rubbery and have little flavor. It is quite easy to make fresh tortillas at home and with a little practice you’ll be quickly rolling out fresh tortillas in no time.

Tortillas de Harina

There’s nothing better than fresh homemade tortilla hot off the comal, and, with the use of a kitchen scale, it couldn’t be faster to pull this dough together .

  • 16 Ounces All purpose flour
  • 4 Ounces Pork Lard or Shortening
  • 1 C Boiling water
  • 2 t Salt
  1. In a large bowl add flour and shortening. Using your hands or a pastry blender, work the shortening onto he flour until the mixture resembles wet sand.

    Bring to boil a cup of water. Remove from heat and add salt, stir until the salt dissolves.

    Stir in hot water to the dry ingredients until just combined. Turn out dough onto a lightly floured surface and knead until a smooth ball forms. About three minutes. Wrap dough in plastic a set aside to rest for a minimum of two hours. Do not refrigerate.

    Separate the dough into small round balls. Roughly 1.5 ounces makes a nice size tortilla.

    Flatten the ball on a lightly floured surface and roll once, turn 1/4 turn and roll again, repeat a few more times and continue to roll out until paper thin. Roll out all the dough.

    Heat a cast iron comal or griddle to medium heat. Splash a bit of water to check if the comal is at the proper temp. The water will sizzle and quickly evaporate when ready.

    Place a tortilla on the comal and cook until it just begins to get tiny bubbles, flip and cook until light golden, flip to finish cooling.

    Lay out the hot tortillas onto a clean kitchen cloth to cool flat. Stack the tortillas and store in a plastic bag. They will keep refrigerated for several days or frozen.

Awesome Meatballs

So my husband named this meatball recipe!  And, they are delicious!!
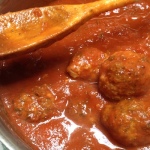
I love that these meatballs are baked in the oven, so they are very quick  to mix up and with minimal mess.  The recipe makes a huge batch, about 40 meatballs.  These freeze really well  and are always great to have on hand.  When I do make a batch, I have to keep it on the down low as my daughters (aka sticky fingers), will surely stop by and raid my freezer.  <3<3<3
This recipe comes from America’s Test  Kitchen with a few minor modifications.
My marinara sauce will be posted soon…


Awesome Meatballs

  • 1 lb. ground beef
  • 1 lb. ground veal
  • 1 lb. ground pork
  • 2.25 cup Panko Bread Crumbs
  • 1.5 cup Buttermilk
  • 3 large eggs
  • 5 oz. Prosciutto (thinly sliced and chopped fine)
  • 3 oz. Parmesan Cheese (Grated about 1 1/2 cups)
  • 6 Tablespoons Parsley (fresh minced)
  • 3 cloves garlic (pressed through a garlic press – about 1 tablespoon)
  • 1.5 tsp Knox unflavored gelatin (dissolved in 3 tablespoons of water)
  • 1.5 tsp Salt
  • 1.5 tsp Pepper
  • 1.5 tsp Oregano (dried leaves)
  1. Instructions
    FOR THE MEATBALLS: Place wire racks in 2 foil-lined rimmed baking
    sheets. Adjust oven racks to lower-middle and upper-middle positions and
    heat oven to 450 degrees. Combine bread crumbs and buttermilk in large bowl
    and let sit, mashing occasionally with fork, until smooth paste forms,
    about 10 minutes.
    Add eggs, beef, pork, prosciutto, Parmesan, parsley, garlic, gelatin
    mixture, 11/2 teaspoons salt, and 1/2 teaspoon pepper to bread-crumb
    mixture. Using hands, gently mix until thoroughly combined. Lightly form
    about ¼ cup mixture into 2-inch round meatball (about 2 ounces); repeat
    with remaining mixture to form approximately 40 meatballs.
    Spray wire racks with nonstick cooking spray and place meatballs, evenly
    spaced, on racks; roast until browned, about 30 minutes, rotating trays
    from front to back and top to bottom halfway through.

    As the meatballs come out of the oven, I drop them into a pot of my favorite marinara sauce.

Hojarascas

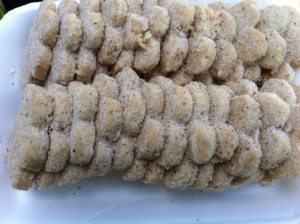
hojarascas1Hojarascas (pronounced “oha-rascas” – the H is silent), when done right, are light, flakey and absolutely, deliciously addictive cinnamon sugar coated shortbread cookies.

As a child, I recall tasting hojarascas that were purchased from the local Mexican bakery. I found them to be heavy and dry and didn’t understand what all the fuss was about.

Not until many years later, a friend and coworker brought a tin of hojarascas (that her grandmother had  made) into our office. The cookies were deliciously light, flakey and addicting. So, I thought I would look for a recipe and give them a try.

After hours of hard work, sadly my cookies were terrible! They were heavy, dry and certainly, nothing like the tasty treats my friend’s grandmother had made.

One restless night, as I was flipping through the TV channels, I came across a Mexican cooking show. Note this was back in the early 80’s prior to the well-produced food TV shows we’ve become accustomed to seeing. A young man was with his grandmother demonstrating how she made Hojarascas.

Fortunately, I am fluent in Spanish and was able to follow the broadcast. Her recipe was very similar to the one I had BUT the big difference was the method she used to make the dough. The very next day I made a batch of these cookies using my same recipe with the technique I had learned. SUCCESS! This recipe has become a part of my holiday tradition.


Hojarascas

deliciously light, flakey and addicting

  • 2 Eggs
  • 2 T Baking powder
  • 1 C Sugar
  • 5 Cinnamon sticks
  • 1 Lb Pork Lard or Shortening
  • 6 C All purpose flour
  1. Blend together cinnamon sticks with sugar. Strain the mixture into a large bowl. Add eggs, baking powder and lard. Mix until combined. Gradually, stir in flour one cup at a time. Once the mixture becomes difficult to stir in the flour, pour out the contents of the bowl onto a floured surface and continue to work in the remaining flour by hand until well incorporated. Divide to dough into two equal parts, wrapping one piece in plastic wrap until ready to use. Knead the dough until smooth and pliable. You can use a standing mixer fitted with a paddle to make the job easier. Roll the dough out to roughly 1/4″ to 1/2 ” thick, as you would for basic sugar cookies, and cut out using your favorite shapes. Place on an ungreased cookie sheet and bake at 350 for 15 minutes.
  2. Combine 2 C. Sugar with ground cinnamon.

    As cookies come out of the oven, gently toss in the cinnamon sugar to coat. Set aside to cool.

    These cookies keep well when stored in an airtight container.